
Nothing can throw off a Sacramento morning quite like a cold shower when you expect hot water. Water heater troubles disrupt daily routines and can quickly turn into expensive emergencies if they go unchecked. By learning a few simple steps for assessing safety, inspecting for damage, and checking performance, you can catch problems early and possibly avoid the cost of emergency plumbing. Protecting your home starts with smart, safe troubleshooting before picking up the phone.
Table of Contents
- Step 1: Assess Water Heater Safety and Power
- Step 2: Inspect for Leaks and Obvious Damage
- Step 3: Check Temperature Settings and Reset Options
- Step 4: Evaluate Pilot Light or Heating Elements
- Step 5: Test Hot Water Output and Verify Fixes
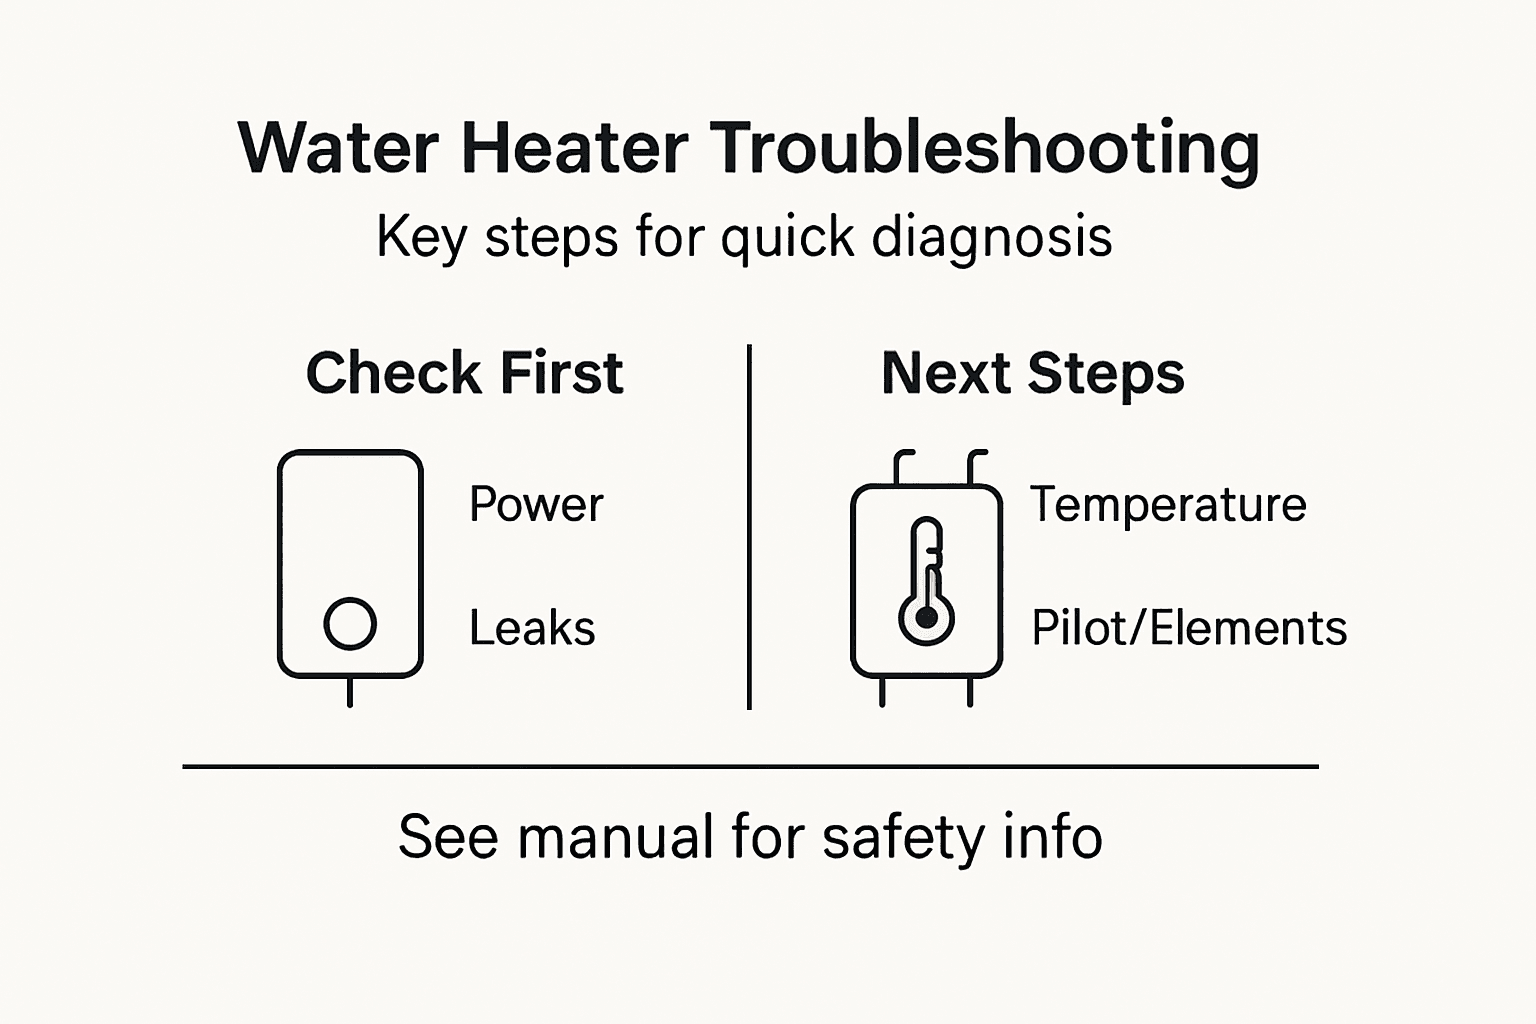
Quick Summary
| Key Insight | Explanation |
|---|---|
| 1. Ensure Power Supply is Safe | Check the circuit breaker for electric heaters or inspect gas supplies for gas heaters to confirm proper operation. |
| 2. Inspect for Leaks and Damage | Look for water pooling or rust on the heater, which may indicate leaks or corrosion that needs professional repair. |
| 3. Adjust Temperature Settings | Set your water heater thermostat between 120 and 140 degrees Fahrenheit for optimal performance and safety. |
| 4. Evaluate Pilot Light or Heating Elements | For gas heaters, ensure the pilot light is lit; for electric units, listen for sounds indicating active heating. |
| 5. Test Hot Water After Adjustments | Run hot water and check temperatures to confirm that adjustments resolved any previous heating issues. |
Step 1: Assess Water Heater Safety and Power
Before you do anything else, you need to check whether your water heater is operating safely and receiving proper power. This step protects you from electrical hazards and helps you identify whether the problem is something you can troubleshoot or if you need professional help immediately.
Start by locating your water heater’s power source. If you have an electric model, find the circuit breaker in your electrical panel that controls the heater. Look for a breaker labeled “water heater” or check your panel’s diagram. For gas water heaters, you’ll be looking at the gas supply line and the ignition system instead. Either way, verify that the power is actually reaching your unit. A tripped breaker or shut-off valve could be why you have no hot water at all.
Next, check the thermostat setting on your tank itself. Most residential water heaters follow energy efficiency standards that recommend keeping temperatures between 120 and 140 degrees Fahrenheit. If your dial is set too low, cold water makes sense. Turn it up slightly and wait 30 to 45 minutes to see if hot water returns. Many homeowners forget they’ve lowered this setting after a vacation or maintenance work.
Inspect the power cord or gas line for any visible damage, kinks, or disconnections. Don’t touch anything that looks wet or smells like gas. If you detect a gas smell, leave your home immediately and call your local gas company or emergency services. For electric units, look for water pooling around the base or scorching on the cord itself. These are serious safety concerns that require professional attention right away.
Look at any warning lights or indicator panels on your unit. Some heaters have reset buttons that trip when there’s an internal issue. If you see a red reset button, don’t press it repeatedly. Press it once, then monitor whether the heater restarts. If it trips again immediately, that’s your signal to stop troubleshooting and contact a professional. The International Residential Code mandates specific safety requirements that your heater must meet, and repeated failures suggest a code violation or serious malfunction.
Pro tip: Write down your water heater’s model number and the date you perform this safety check. You’ll need this information if you call a plumber, and it helps you track maintenance history over time.
Below is a quick-reference guide comparing safety steps for electric versus gas water heaters:
| Safety Step | Electric Water Heater | Gas Water Heater |
|---|---|---|
| Main Power Check | Inspect circuit breaker, power cord | Inspect gas line, ignition system |
| Warning Signs | Scorching, water pooling, tripped breaker | Smell of gas, yellow flame, gas shut-off |
| Immediate Danger | Wet cords, burnt smell, sparking | Gas odor, pilot outage, hissing sounds |
| Critical Response | Call electrician/plumber immediately | Leave home, call gas company/emergency |
Step 2: Inspect for Leaks and Obvious Damage
Now that you’ve confirmed your water heater has power, it’s time to look for the physical signs of trouble. Leaks and visible damage are often the culprits behind performance problems, and catching them early prevents costly water damage to your Sacramento home.
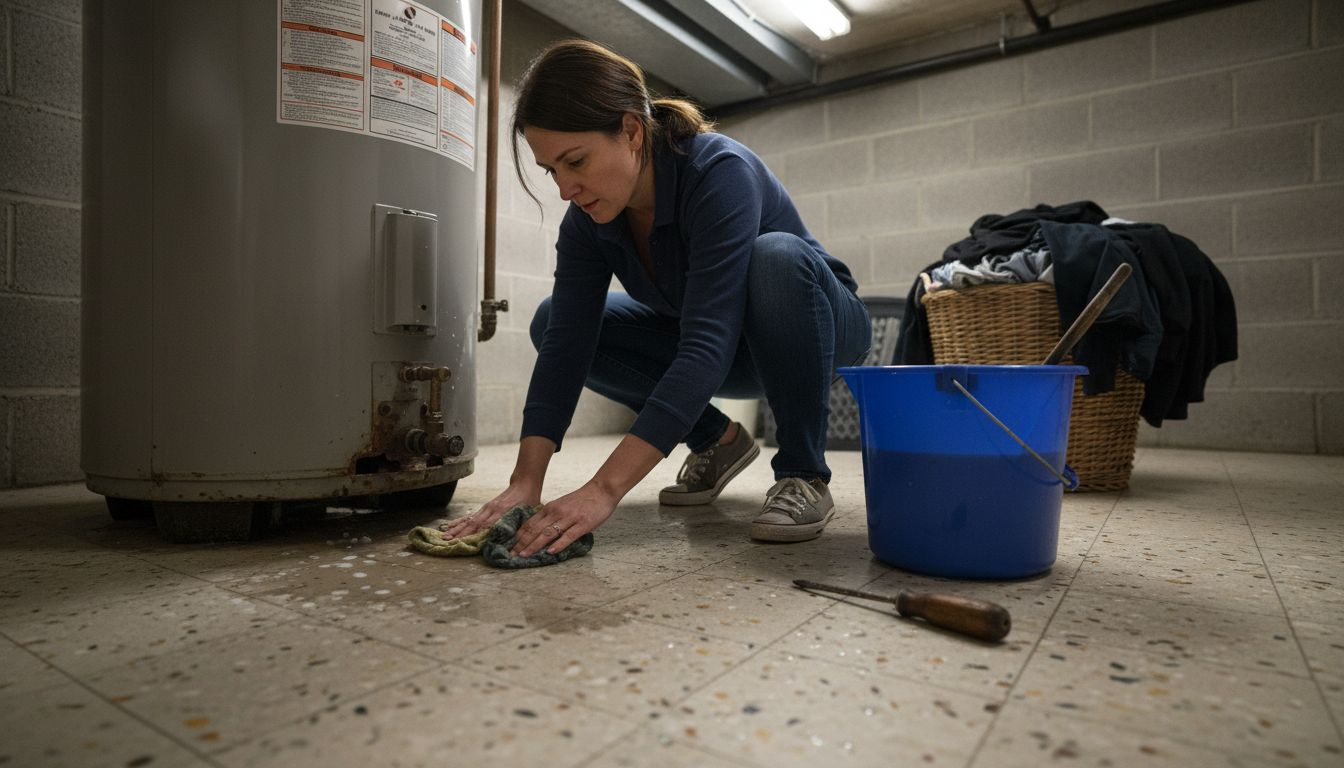
Start by getting down low and examining the base of your water heater tank. Look for standing water, wet spots on the floor, or damp concrete. Even small puddles matter because they indicate that something is leaking from your unit. Check the drain pan underneath the tank if one exists. Water pooling here suggests a slow leak from seals or the tank itself. Also inspect the cold water inlet connection at the top of the tank where water enters the system.
Move your attention to all visible connections and valves around the tank. Look at the temperature and pressure relief valve, the drain valve near the bottom, and any flex lines or copper pipes attached to the unit. Water leaks from worn seals and corroded valves are among the most common issues homeowners encounter. Tighten any loose connections by hand first. If water continues dripping after tightening, that connection will need professional replacement.
Examine the tank exterior for rust, corrosion, or discoloration. Rust stains typically indicate internal corrosion that’s eating away at the tank structure. These stains often appear as orange or brown streaks running down the side. Corrosion can eventually lead to pinhole leaks that are extremely difficult to repair. If you see significant rust or if the tank feels soft when you gently tap it, your heater is nearing the end of its life.
Listen carefully for hissing, crackling, or popping sounds coming from inside the tank. These noises often mean sediment buildup is burning on the heating element. You should also smell around the unit. A musty or moldy odor combined with visible moisture can indicate internal corrosion or component failure. Trust your senses here because they catch problems before they become emergencies.
Pro tip: Take photos of any wet spots, rust, or unusual connections before calling a plumber. These images help your technician diagnose the problem faster and prevent unnecessary guessing during the service call.
Here’s a summary of typical issues and their likely causes for both electric and gas water heaters:
| Symptom | Electric Heater Possible Cause | Gas Heater Possible Cause |
|---|---|---|
| No hot water | Tripped breaker, failed element | Pilot light out, thermocouple |
| Lukewarm water | Thermostat set too low, sediment | Bad thermostat, dirty burner |
| Water leaks | Loose connections, tank corrosion | Valve leak, tank rust |
| Strange noises | Sediment build-up on element | Sediment burning on burner |
| Rust or discoloration | Tank corrosion, failing anode rod | Internal tank rust |
Step 3: Check Temperature Settings and Reset Options
Temperature control is one of the easiest things to check, yet it’s often overlooked when water heater problems pop up. A simple adjustment to your thermostat or a reset of the high-limit control can restore hot water and save you hundreds of dollars in repair costs.
Locate the thermostat dial on your water heater. On electric models, you’ll typically find it on the side of the tank, usually covered by an access panel. On gas heaters, look for a dial near the burner compartment at the bottom. The dial shows your current temperature setting and allows manual adjustment. Most residential water heaters should operate between 120 and 140 degrees Fahrenheit, which provides a good balance between comfort and safety. If your dial is set significantly lower, like below 100 degrees, that’s likely why you’re getting lukewarm or cold water.
Adjust the dial to a higher temperature if it’s too low. Turn it up gradually, maybe 10 to 15 degrees at a time. Wait 30 to 45 minutes before testing your hot water again. Don’t crank it all the way to maximum because residential water heaters must have thermostatic controls set to avoid scalding risks and excessive temperatures. Going too high wastes energy and can burn you or your family.
On electric water heaters, look for the reset button on the high-limit control near the upper thermostat. This button protects your heater by cutting power if water temperature gets dangerously high. If the button is popped out, press it firmly once to reset it. Wait a few minutes, then check if the heater restarts and begins heating water again. If this button trips repeatedly, that signals a deeper problem that requires professional diagnosis.
For gas water heaters, the pilot light might need attention if temperatures aren’t rising. Check if the pilot is lit by looking through the observation window near the burner. A steady blue flame means it’s working. If the pilot is out, follow your heater’s manual to relight it safely. Never force this step if you’re uncomfortable with gas appliances. Call a professional instead.
Pro tip: Mark your thermostat dial with a permanent marker at your ideal temperature setting. This helps you quickly spot if someone accidentally adjusted it and makes it easy to return to your preferred setting after any future maintenance work.
Step 4: Evaluate Pilot Light or Heating Elements
The ignition system is where your water heater actually creates heat. If your thermostat is set correctly but water still isn’t warming up, the problem likely lies with the pilot light in gas models or the heating elements in electric units. This step helps you determine whether these components are functioning.
For gas water heaters, start by locating the pilot light observation window. You should see a small opening near the bottom of the tank where the burner compartment sits. Look through this window to spot the pilot flame. A healthy pilot light burns with a steady blue flame about the size of a match head. If you see a yellow or orange flame instead, the pilot may be dirty and not burning efficiently. If the flame is absent completely, the pilot has gone out and needs to be relit according to your manufacturer’s instructions.
Before attempting to relight a pilot, always consult your heater’s manual for the specific sequence. The safety mechanism includes a thermocouple that senses the pilot flame and allows gas to flow. If the thermocouple senses the pilot light is extinguished, it automatically cuts off gas to prevent dangerous leaks. This is actually a protective feature, not a problem. When relighting, you typically need to hold down a button while igniting the pilot with a long lighter or match.
For electric water heaters, you cannot see the heating elements directly because they’re inside the tank. Instead, check for power reaching them and listen for signs of activity. You should hear a faint humming or clicking sound when the thermostat calls for heat. If you hear nothing, the problem might be a tripped breaker, a burnt out heating element, or a faulty thermostat. Electric water heaters use heating elements controlled by thermostats to maintain temperature. Testing these components requires a multimeter and electrical knowledge, so this is where you should call a professional.
If the pilot light relights but goes out again immediately, or if the heating element doesn’t seem to be working at all, your troubleshooting has reached its limit. These failures usually mean component replacement is necessary.
Pro tip: If you successfully relight your gas water heater’s pilot light, note the date and time. If the pilot goes out again within a few days, you have a thermocouple problem that requires professional replacement rather than repeated manual relighting.
Step 5: Test Hot Water Output and Verify Fixes
You’ve completed your troubleshooting steps, and now it’s time to verify whether your fixes actually worked. Testing your hot water output confirms that the problem is resolved and your water heater is functioning properly for your household.
Start by opening a hot water tap in your home and letting it run for about 30 seconds. Place your hand near the stream to feel the temperature. Ideally, hot water should feel noticeably warm or hot to the touch, not just lukewarm. If it’s still cold or barely warm after a few minutes of running, your thermostat adjustment or reset button press didn’t solve the problem. Note the exact temperature if you want to be thorough. You can also hold a thermometer under the stream to get a precise reading, aiming for that 120 to 140 degree Fahrenheit range you adjusted earlier.
Test multiple hot water sources throughout your home. Run a sink in your bathroom, then try the kitchen sink, then check a shower. If hot water comes out at one location but not another, you might have a pipe insulation issue or a problem with your home’s plumbing distribution system rather than the water heater itself. Consistent hot water at all locations means your heater is distributing properly.
Wait a reasonable amount of time if you’ve just adjusted the thermostat or reset the heater. Testing hot water output requires measuring water temperature and flow rate over time to ensure the issue is actually resolved. After 45 minutes to an hour, check again. Sometimes it takes longer than expected for the water to fully heat, especially if you drained the tank during your inspection.
Run hot water continuously for a few minutes. Does the water stay hot consistently, or does it cool down quickly? If it cools rapidly, sediment buildup inside the tank might be interfering with heating efficiency. If everything checks out and hot water is flowing at the right temperature, congratulations. Your troubleshooting worked. If problems persist, it’s time to call Legacy Plumbing & Drain for professional diagnosis and repair.
Pro tip: Keep a simple water temperature log for a few days after your fix. Note the time, temperature, and any issues you notice. This information helps a plumber understand patterns if you need professional service and proves your troubleshooting efforts.
Keep Your Water Heater Safe and Efficient with Legacy Plumbing & Drain Inc
Struggling with cold showers or worrying about leaks and electrical hazards from your water heater is frustrating and stressful. This guide helps you understand vital safety checks, temperature adjustments, and pilot light inspections but some problems need expert care. Do not risk your home or family’s comfort by ignoring warning signs like tripped breakers, gas odors, or persistent leaks. Trusted plumbing professionals can restore your peace of mind quickly and safely.
Trust Legacy Plumbing & Drain Inc for fast, reliable water heater troubleshooting and repair in Sacramento. Our licensed technicians are available 24/7 to handle everything from thermostat resets to component replacements so you get hot water when you need it. Visit our website today to schedule service and explore how our comprehensive plumbing solutions protect your home’s comfort and safety. Don’t wait until a small problem turns into an emergency call now for expert support.
Frequently Asked Questions
How do I assess the power supply to my water heater?
To assess the power supply, locate the circuit breaker for electric heaters or check the gas supply line for gas heaters. Ensure the breaker is not tripped, and verify that the gas line is connected and free of leaks.
What should I inspect for leaks on my water heater?
Look for standing water or damp spots around the base of your water heater and check connections and valves for signs of moisture. Tighten any loose connections by hand, but call a professional if you still see leaks after tightening.
How can I check and adjust the temperature settings on my water heater?
Locate the thermostat dial on your water heater and adjust it to between 120 and 140 degrees Fahrenheit. Make small adjustments of 10 to 15 degrees and wait 30 to 45 minutes to test the hot water again.
What should I do if my pilot light goes out?
If your pilot light goes out, follow your water heater’s manual to safely relight it. If it goes out again shortly after, this may indicate a problem with the thermocouple that needs professional evaluation.
How do I verify that my hot water issues are resolved?
Open a hot water tap and let it run for about 30 seconds to feel the temperature. If the water is not hot enough, wait another 45 minutes and recheck the temperature, ensuring consistent hot water output across multiple faucets.
Recommended
- Top 10 Best Water Heater Brands For Your Home
- Sacramento Water Heater Leaks: Causes & Quick Fixes | Legacy Plumbing & Drain
- Why Maintain Water Heaters In Sacramento Homes – Legacy Plumbing & Drain – Emergency Plumbers Of Sacramento
- Understanding Your Water Heater Maintenance Guide – Legacy Plumbing & Drain – Emergency Plumbers Of Sacramento