
Cleaning a bathroom drain may seem simple, but the truth is that over 80 percent of household blockages start with just a bit of overlooked debris. Most people think they just need a bottle of cleaner and a quick flush. Actually, pro plumbers say the tools you collect before you even touch the drain can be the biggest reason your cleaning works or fails.
Table of Contents
- Step 1: Gather Necessary Cleaning Supplies And Tools
- Step 2: Remove Drain Covers And Clean Debris
- Step 3: Use A Natural Drain Cleaner Solution
- Step 4: Flush Drains With Hot Water
- Step 5: Reattach Drain Covers And Verify Functionality
Quick Summary
| Key Point | Explanation |
|---|---|
| 1. Assemble essential cleaning tools first | Gather key items like gloves, a plunger, a drain snake, and baking soda to effectively prepare for cleaning bathroom drains. |
| 2. Remove drain covers carefully | Use the appropriate tools to gently take off drain covers and inspect for debris buildup without causing damage to the cover. |
| 3. Use natural cleaning solutions | Combine baking soda and vinegar to create a non-toxic cleaner that efficiently breaks down organic blockages in your drains. |
| 4. Flush drains with hot water monthly | Regularly flush drains with hot water to help dissolve leftovers and prevent future blockages, ensuring smooth drainage. |
| 5. Reattach drain covers securely | After cleaning, carefully put drain covers back in place to maintain a proper seal and check drainage functionality. |
Step 1: Gather necessary cleaning supplies and tools
Successful cleaning of bathroom drains begins with strategic preparation and having the right tools at your disposal. Before diving into the drain cleaning process, collecting the appropriate supplies will save you time and ensure a more effective cleaning experience. Professional plumbers recommend assembling your toolkit before starting any drain maintenance project.
Essential Tools for Drain Cleaning
Your drain cleaning arsenal should include several key items that will help you tackle most bathroom drain challenges. Based on recommendations from professional plumbing experts, here’s what you’ll want to gather:
- Rubber protective gloves to shield your hands from chemicals and bacteria
- Plunger (preferably a flange-style plunger for better seal)
- Drain snake or auger
- Bucket for collecting debris
- Adjustable wrench
- Flashlight
- Baking soda
- White vinegar
Protective gear is crucial when working with drain cleaning solutions. According to the CDC’s safety guidelines, wearing gloves helps prevent direct contact with potentially harmful bacteria and cleaning chemicals. Choose long rubber gloves that extend past your wrists for maximum protection.
Organizing your tools before beginning ensures a smooth workflow. Lay out all your equipment on a clean surface near the bathroom sink or tub. Check that each tool is in good condition and easily accessible. A well-prepared workspace can make the difference between a frustrating drain cleaning experience and a successful one.
Below is a summary table of the essential tools and supplies for bathroom drain cleaning, including each item’s purpose to help streamline your preparation.
| Tool/Supply | Purpose |
|---|---|
| Rubber gloves | Protect hands from chemicals and bacteria |
| Flange-style plunger | Create suction to dislodge blockages |
| Drain snake/auger | Reach and remove deeper clogs inside the pipe |
| Bucket | Collect debris or water during cleaning |
| Adjustable wrench | Remove or tighten drain cover screws |
| Flashlight | Illuminate inside the drain to spot debris |
| Baking soda | Natural cleaning agent for breaking down blockages |
| White vinegar | Combines with baking soda for natural cleaning reaction |
Pro tip: Keep a small container or toolbag dedicated to drain cleaning supplies. This helps you maintain organization and ensures you always have the right tools ready when maintenance is needed. Remember that having the right equipment is half the battle when addressing drain blockages.
Step 2: Remove drain covers and clean debris
Removing drain covers is a critical first step in thoroughly cleaning bathroom drains. This process allows you to access accumulated debris and prevent potential long-term plumbing issues. Careful removal helps you identify and eliminate blockages before they become serious problems.
Begin by carefully examining the type of drain cover you have. Bathroom sink and shower drains typically feature different attachment mechanisms. For most standard drains, you will need a flathead screwdriver or a specialized drain removal tool. Gently work around the edges of the cover, applying steady pressure to lift it without causing damage. Avoid using excessive force, which could crack or break the drain cover.
According to the EPA’s guidelines on home maintenance, regular debris removal is essential for maintaining healthy drainage systems. Once you’ve removed the cover, use a flashlight to inspect the drain opening. Look for visible hair, soap scum, and other accumulated materials that might obstruct water flow.
Using needle-nose pliers or a drain cleaning hook, carefully extract any visible debris. Work methodically and patiently, pulling out hair and buildup in sections. Wear your protective gloves to keep your hands clean and protected from bacteria. If the debris is tightly compacted, you might need to use gentle twisting motions to loosen and remove it completely.
After removing visible debris, take a moment to wipe down the drain cover and surrounding area with a disinfectant cloth. This prevents bacterial growth and ensures a clean starting point for the next stages of your drain maintenance. Pay special attention to any grooves or crevices where grime might accumulate.
Verify your progress by checking that the drain opening looks clear and unobstructed. A clean drain cover and opening should allow you to see directly into the pipe without any visible blockages. If you encounter significant resistance or cannot fully clear the debris, this might indicate a more complex plumbing issue that requires professional intervention.
Step 3: Use a natural drain cleaner solution
Natural drain cleaning solutions provide an effective and environmentally friendly approach to clearing minor bathroom drain blockages. Chemical-free methods not only protect your plumbing but also safeguard your home’s ecological balance. By utilizing simple household ingredients, you can create powerful cleaning solutions that remove buildup without harsh toxins.
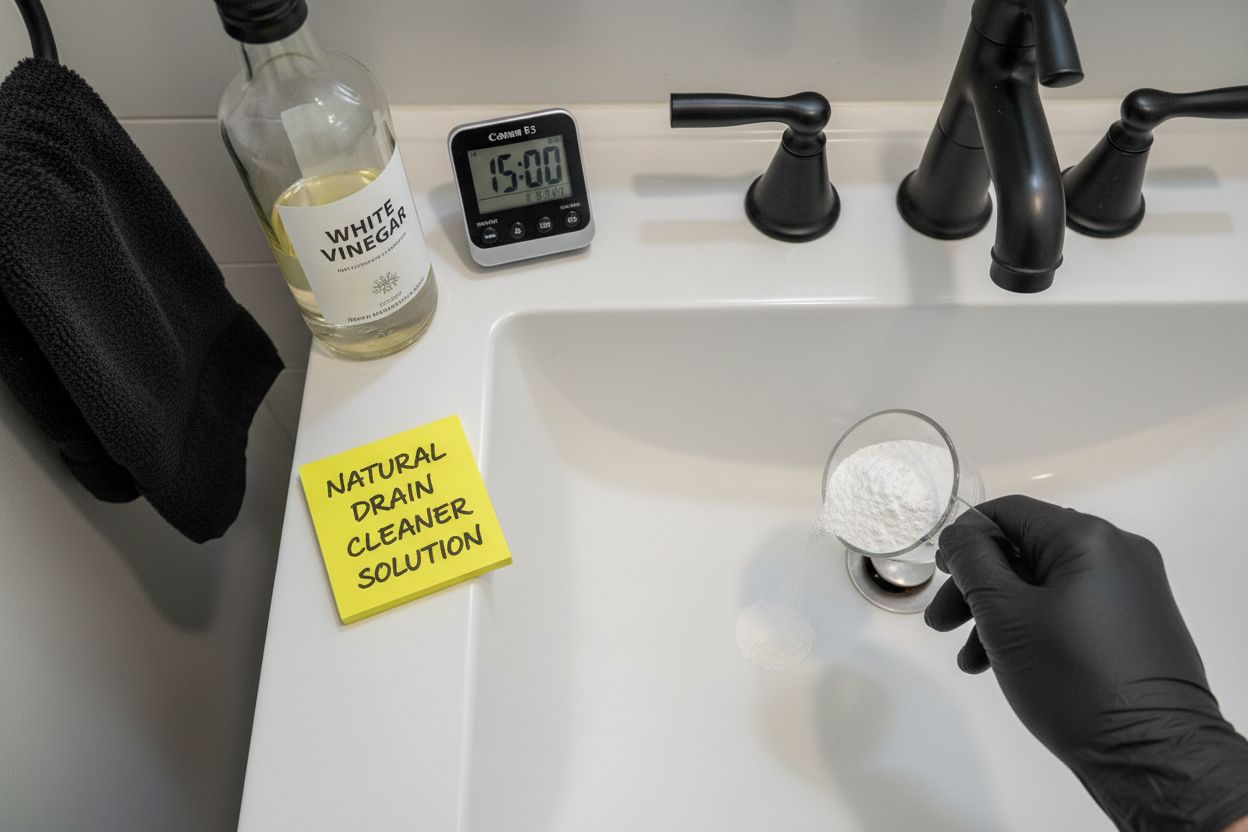
According to the EPA’s safer choice guidelines, natural cleaning methods can be remarkably effective. The classic combination of baking soda and white vinegar creates a powerful chemical reaction that helps break down organic debris and mineral buildup. Start by pouring approximately one cup of baking soda directly into the drain, ensuring it reaches as far down the pipe as possible. Allow the baking soda to settle for several minutes, which helps it penetrate initial layers of grime.
Next, slowly pour one cup of white vinegar into the drain. The mixture will immediately begin fizzing and bubbling, creating a natural scrubbing action that dislodges accumulated materials. Cover the drain opening with a stopper or cloth to concentrate the reaction within the pipe. Let the solution work for 15 to 20 minutes, giving ample time for the chemical interaction to dissolve minor blockages and clean pipe surfaces.
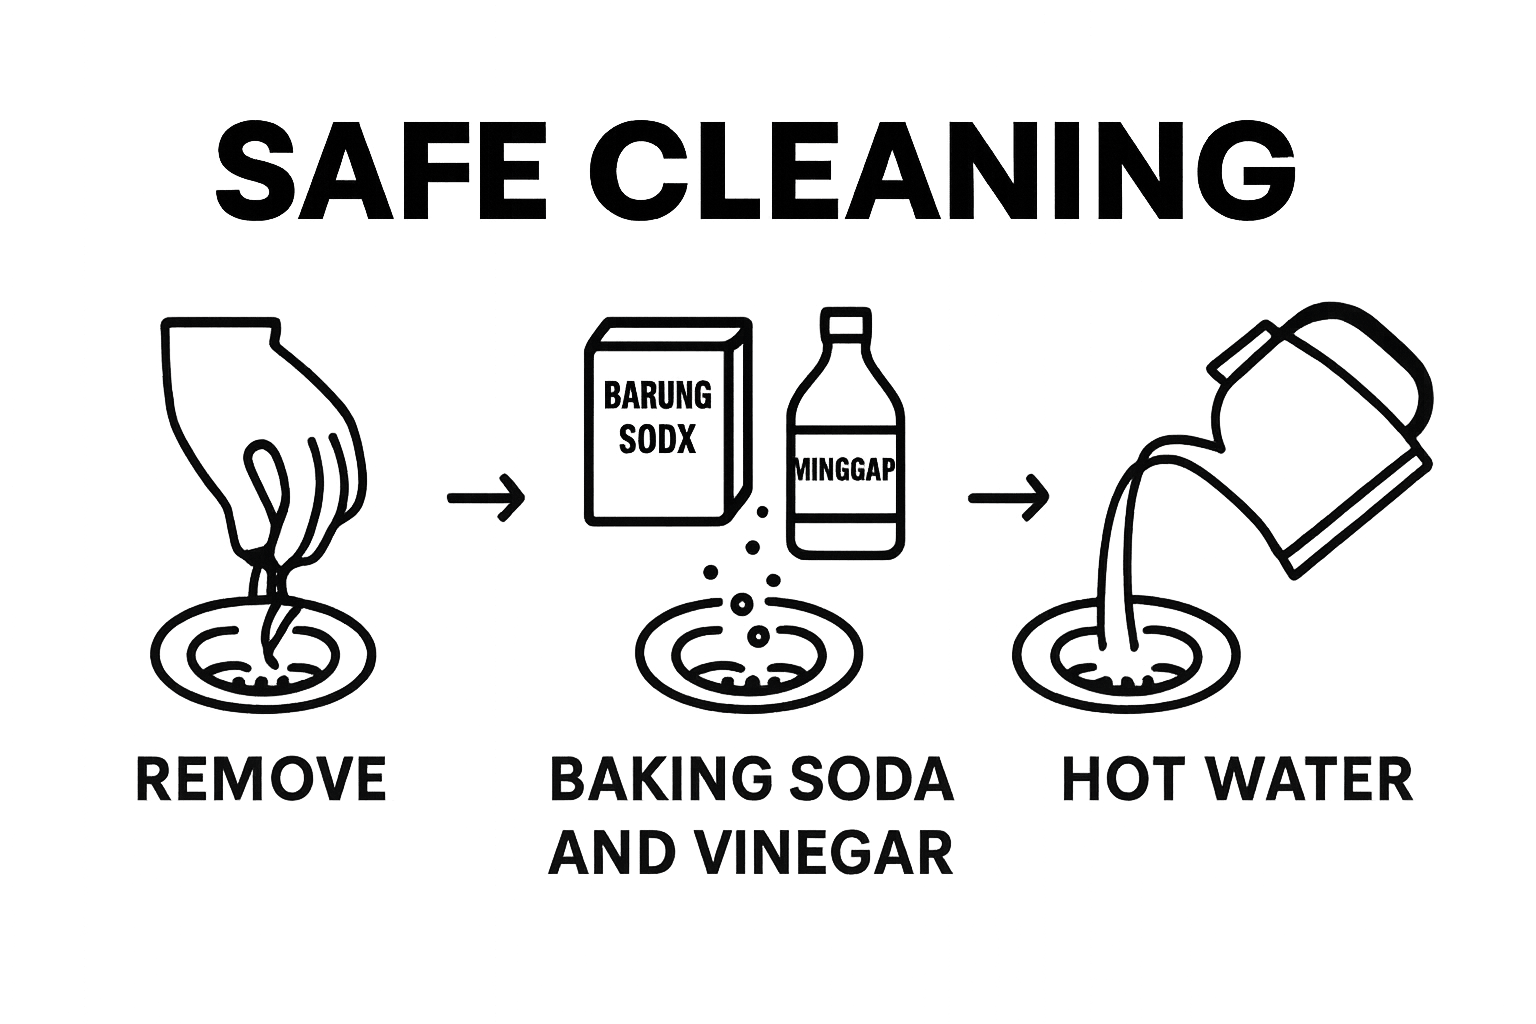
After the waiting period, flush the drain thoroughly with hot water.
 The temperature helps further break down any remaining debris and rinses away the cleaning solution. For added effectiveness, you can boil water and carefully pour it down the drain in stages, creating a powerful flushing action that helps clear any loosened materials.
To verify the cleaning process worked, run water at full pressure and observe the drainage speed. A successfully cleaned drain should allow water to flow smoothly without any backing up or slow draining. If you notice persistent issues, this might indicate a more significant blockage requiring professional investigation into drain cleaning methods.
Pro tip: Repeat this natural cleaning process monthly as a preventative maintenance technique. Consistent care helps keep your bathroom drains clear and functioning optimally, reducing the likelihood of more serious plumbing problems developing over time.
The following table provides a step-by-step overview of the bathroom drain cleaning process, outlining each stage, the main actions, and what you should achieve before moving to the next step.
| Step | Main Action | Key Outcome |
|---|---|---|
| Gather Supplies & Tools | Collect all required tools/materials | Organized, ready-to-use cleaning toolkit |
| Remove Drain Covers & Clean Debris | Remove covers; extract visible debris | Clear drain opening and clean cover area |
| Use Natural Cleaner (Baking Soda & Vinegar) | Apply baking soda then vinegar; let fizz | Blockages broken down and loosened |
| Flush with Hot Water | Pour hot water into the drain | Remaining debris dissolved and rinsed away |
| Reattach Cover & Verify Functionality | Securely replace drain cover; test drainage | Proper seal, smooth water flow, no leakage |
Step 4: Flush drains with hot water
Flushing bathroom drains with hot water represents a critical step in ensuring thorough cleaning and preventing future blockages. Hot water acts as a powerful, natural solvent that helps dissolve remaining organic materials and prevents potential buildup.
This simple yet effective technique can significantly improve your drain’s overall performance and longevity.
According to the Plumbing and Drainage Institute, regular hot water flushing helps maintain optimal pipe conditions. Begin by selecting the right water temperature. You want water that is hot but not boiling, which could potentially damage plastic pipes or plumbing fixtures. The ideal temperature range is between 120 to 140 degrees Fahrenheit, which effectively breaks down soap scum, grease, and minor organic residues without risking pipe damage.
If you are using a kettle, allow the water to reach a vigorous boil, then let it sit for approximately 30 seconds to reduce the temperature slightly. Carefully pour the hot water directly into the drain in a steady, controlled stream. For bathroom sinks, position the kettle’s spout close to the drain opening to maximize direct water flow. Move slowly to ensure the entire pipe receives thorough treatment, which helps dislodge any remaining debris from the previous cleaning steps.
For shower and bathtub drains, you might need to pour the hot water in multiple stages. Start by pouring a small amount, then wait 15-20 seconds before adding more. This technique allows the hot water to penetrate deeper into the pipe system and prevents potential splashing. Watch the drain carefully during this process to observe how water moves and drains.
To verify the effectiveness of your hot water flush, run tap water at full pressure immediately after. A successfully cleaned drain will allow water to flow smoothly without any backing up or slow drainage. If you notice any lingering issues with water flow, you might need to repeat the hot water process or consider exploring alternative drain cleaning methods.
Pro tip: Implement hot water flushing as a monthly maintenance routine. This preventative approach helps keep your bathroom drains clear, reduces the likelihood of future blockages, and maintains optimal plumbing performance. Consistency is key in maintaining healthy, functional drainage systems.
Step 5: Reattach drain covers and verify functionality
Returning your drain covers to their original position is the final crucial step in the bathroom drain cleaning process. Proper reattachment ensures your drain remains secure and functions optimally. This step requires careful attention to detail and a systematic approach to guarantee everything is correctly reinstalled.
According to plumbing maintenance guidelines, correctly replacing drain covers prevents potential water leakage and maintains the integrity of your plumbing system. Begin by carefully examining the drain cover and its original mounting location. Inspect the cover for any damage or wear that might have occurred during the cleaning process. Clean the drain cover thoroughly with a disinfectant cloth to remove any accumulated grime or residue.
Align the drain cover precisely with its original mounting points. For screw-type covers, ensure the screws are clean and not corroded. If you encounter any resistance or the cover does not sit flush, take a moment to investigate the cause. Gently wiggle the cover to confirm it is seated correctly without any gaps or misalignments. Use your adjustable wrench to tighten screws evenly, applying consistent pressure to prevent over-tightening, which could potentially crack the cover or damage the surrounding surface.
To verify functionality, conduct a comprehensive drainage test. Run water at various pressure levels and observe how it flows through the drain. Watch for smooth water movement, consistent drainage speed, and absence of any unusual gurgling sounds. Pay close attention to how quickly water disappears and whether there are any signs of backing up or slow drainage. If you notice any irregularities, you might need to repeat previous cleaning steps or consult professional drain cleaning methods.
Additionally, perform a visual inspection around the drain cover. Check for any water seepage, moisture accumulation, or signs of improper sealing. A correctly reinstalled drain cover should create a watertight seal that prevents water from escaping around its edges. Run your finger carefully around the drain cover’s perimeter to ensure a smooth, consistent connection with the surrounding surface.
Pro tip: Consider marking your calendar for the next routine drain maintenance. Regular cleaning prevents long-term buildup and helps you catch potential plumbing issues before they become significant problems. Consistent care is the key to maintaining healthy, functional bathroom drains.
Don’t Let Stubborn Bathroom Drain Problems Disrupt Your Day—Let the Experts Help
Tired of battling slow drains, recurring blockages, or stubborn debris that just will not budge? Even with the right tools and careful cleaning, you might face clogs that are too tough or recurring issues that signal bigger plumbing problems. Manual efforts and natural solutions work well for maintenance, but major blockages, unseen buildup, or persistent drainage concerns can make bathroom upkeep overwhelming and stressful. You deserve to feel confident that your home’s plumbing is safe, efficient, and hassle-free.

Get peace of mind and lasting results by partnering with Sacramento’s trusted professionals. At Legacy Plumbing & Drain Inc, our skilled team stands ready 24/7 to resolve everything from hidden drain obstructions to full emergency repairs. Do not waste another minute worrying about backups or lingering odors. Visit our Home Page now to schedule prompt help or learn about our full suite of drain cleaning and bathroom solutions. Take action today so you can return to a clean, fully functional bathroom—without the mess or worry.
Frequently Asked Questions
What tools do I need for cleaning bathroom drains?
To clean bathroom drains effectively, gather tools such as rubber gloves, a flange-style plunger, a drain snake or auger, a bucket, an adjustable wrench, a flashlight, baking soda, and white vinegar.
How can I safely remove debris from bathroom drains?
To safely remove debris, start by removing the drain cover with a flathead screwdriver or a drain removal tool. Use needle-nose pliers or a drain cleaning hook to extract hair and buildup, ensuring you wear protective gloves for hygiene.
What is the natural method for cleaning bathroom drains?
A natural method involves using a mixture of baking soda and white vinegar. Pour one cup of baking soda into the drain, followed by one cup of vinegar, and let it fizz for 15-20 minutes before flushing with hot water to clear debris.
How often should I clean my bathroom drains?
It’s advisable to clean your bathroom drains monthly as a preventative maintenance technique. Regular cleaning reduces the risk of blockages and ensures optimal functionality.
Recommended
- Understanding The Safest Drain Cleaning Methods – Legacy Plumbing & Drain – Emergency Plumbers Of Sacramento
- Understanding Signs You Need Drain Cleaning For Your Home – Legacy Plumbing & Drain – Emergency Plumbers Of Sacramento
- Understanding Choosing Drain Cleaning Methods For Homeowners – Legacy Plumbing & Drain – Emergency Plumbers Of Sacramento
- Understanding The Benefits Of Regular Drain Cleaning – Legacy Plumbing & Drain – Emergency Plumbers Of Sacramento