
Hidden water leaks can transform a quiet home into an expensive headache before you even notice a problem. Surprisingly, the average household leak can waste almost 10,000 gallons of water every year without any obvious signs. Most people think leaks are always dramatic and easy to spot, but the silent culprits often lurk in places you rarely check, making early detection your strongest shield against repair bills.
Table of Contents
- Step 1: Gather Essential Tools for Leak Detection
- Step 2: Conduct a Visual Inspection of Potential Leak Areas
- Step 3: Monitor Your Water Meter for Unexplained Usage
- Step 4: Check for Signs of Water Damage Inside and Outside
- Step 5: Use Specialized Equipment to Identify Hidden Leaks
- Step 6: Verify Leak Detection Results and Plan Repairs
Quick Summary
| Key Point | Explanation |
|---|---|
| 1. Assemble essential leak detection tools | Gather a high-powered flashlight, moisture meter, and notepad for efficient leak investigations. |
| 2. Conduct thorough visual inspections | Check areas like kitchens and bathrooms for moisture signs, noting any damage or discoloration. |
| 3. Monitor your water meter carefully | Perform tests by shutting off water and observing if the meter reading changes, indicating a possible leak. |
| 4. Use specialized equipment for precision | Employ moisture meters and thermal cameras to uncover hidden leaks not visible to the naked eye. |
| 5. Document findings for informed planning | Keep detailed records of inspections and diagnostics for reference during repair planning and consultations. |
Step 1: Gather Essential Tools for Leak Detection
Detecting hidden leaks requires strategic preparation and the right set of tools to effectively investigate potential water damage in your home. Before you begin your comprehensive leak detection mission, assembling a specialized toolkit will help you diagnose problems quickly and accurately.
The foundational toolkit for detecting hidden leaks should include several key items that empower homeowners to conduct thorough investigations. A high-powered flashlight becomes your primary reconnaissance tool, allowing you to illuminate dark spaces under sinks, behind appliances, and in crawl spaces where water damage often goes unnoticed. Pair this with clean white towels or paper towels, which will help you identify moisture spots and test potential leak areas by absorbing water and revealing subtle dampness.
Your detection kit should also incorporate some precision instruments. A moisture meter can provide scientific measurement of water content in walls, floors, and other surfaces, helping you pinpoint exactly where moisture is accumulating. Professional plumbers recommend digital moisture meters that offer quick readings and can detect water presence even before visible damage occurs. Explore our professional leak detection methods to understand more advanced techniques.
Additionally, include a notepad and pen to document your findings systematically. Sketch out the areas you inspect, note specific locations of potential leaks, and record measurements from your moisture meter. This documentation becomes crucial if you need to consult a professional plumber or track developing issues over time.
Don’t forget practical accessories like a step ladder for reaching high spaces, protective gloves to keep your hands clean and safe, and a small mirror with an extendable handle. This mirror can help you peek into tight spaces behind fixtures or inside wall cavities where direct visual inspection is challenging.
By carefully assembling these tools before beginning your leak detection process, you transform from a passive homeowner into an active investigator, equipped to protect your property from potential water damage. Remember, early detection can save thousands in potential repair costs and prevent extensive structural damage to your home.
Below is a table summarizing the essential tools mentioned in the article for effective hidden leak detection, along with each tool’s primary use and any relevant details.
| Tool | Purpose | Notes/Details |
|---|---|---|
| High-powered flashlight | Illuminates dark or hard-to-reach spaces | Use under sinks, behind appliances, in crawl spaces |
| Moisture meter | Measures water content in walls/floors | Digital models give quick, accurate readings |
| Clean white towels/paper towels | Detects and confirms moisture in suspicious areas | Absorbs water, reveals subtle dampness |
| Notepad and pen | Records findings and inspection notes | Sketches areas, logs meter readings |
| Step ladder | Accesses high or elevated inspection areas | Reaches ceiling corners or tall cabinets |
| Protective gloves | Keeps hands safe during inspections | Useful in dirty or hazardous spots |
| Extendable mirror | Inspect tight or hidden spots | Checks behind fixtures and inside wall cavities |
Step 2: Conduct a Visual Inspection of Potential Leak Areas
Visual inspection represents your first critical line of defense in detecting hidden leaks throughout your home. This strategic examination allows you to identify potential water damage and moisture problems before they escalate into costly repairs. By methodically scanning key areas, you transform from a passive homeowner into an active leak detective.
Begin your visual investigation in areas most prone to water damage. Bathroom and kitchen zones demand careful scrutiny, as these spaces experience constant water exposure. Examine the areas underneath sinks, checking for water stains, warped cabinetry, or subtle discoloration that might indicate persistent moisture. Pay special attention to pipe connections, looking for signs of corrosion, mineral buildup, or tiny droplets that could signal emerging leak points. Learn more about professional leak detection techniques to complement your visual assessment.
Expand your inspection to other critical home zones. Check around toilets for any signs of water pooling or discoloration on the floor, which could indicate a seal failure or hidden pipe issue. Inspect water heater surroundings for rust, puddles, or dampness that might suggest internal tank deterioration. Behind large appliances like refrigerators and washing machines, use your flashlight to illuminate hard-to-see spaces, searching for unexpected moisture or water tracks.
Walls and ceilings offer crucial leak evidence if you know what to examine. Look for telltale signs of water damage such as yellowish or brownish stains, bubbling paint, warped drywall, or subtle discoloration. These visual markers often indicate water has been traveling for some time, potentially revealing leaks hidden within wall cavities. Run your hand gently along surfaces to detect unexpected softness or dampness that visual inspection might miss.
During your investigation, document everything. Take clear photographs of suspicious areas, noting dates and specific locations. This documentation becomes invaluable if you need professional assistance or want to track potential leak progression. Remember, visual detection is about patience and systematic observation. Each careful look potentially saves you from extensive water damage and expensive home repairs.
Step 3: Monitor Your Water Meter for Unexplained Usage
Your water meter serves as a silent sentinel, revealing hidden leaks that might otherwise go unnoticed. This unassuming device can help you detect water loss before it transforms into a costly home repair nightmare. Monitoring your water meter requires patience, precision, and a systematic approach to understanding your household’s water consumption patterns.
Preparation is key when conducting a water meter investigation. Locate your water meter, typically found near the street or in an underground box at the property’s edge. Before beginning your detection process, ensure all water sources in your home are completely shut off. This means turning off dishwashers, washing machines, water heaters, and closing every faucet. Discover advanced leak detection strategies to complement your meter monitoring technique.
To perform the meter test, start by recording the current meter reading. Take a clear photograph or write down the exact numbers displayed. Then, wait approximately 30 to 60 minutes without using any water in your home. Return to the meter and check the reading again. Any movement in the meter during this idle period indicates a potential leak. Even tiny increments suggest water is flowing somewhere in your plumbing system when it should be completely stationary.
For more precise tracking, consider conducting an overnight test. Before going to bed, record the meter reading and ensure no water is being used. In the morning, check the meter immediately upon waking. If the numbers have changed, you likely have a continuous leak happening somewhere in your home.
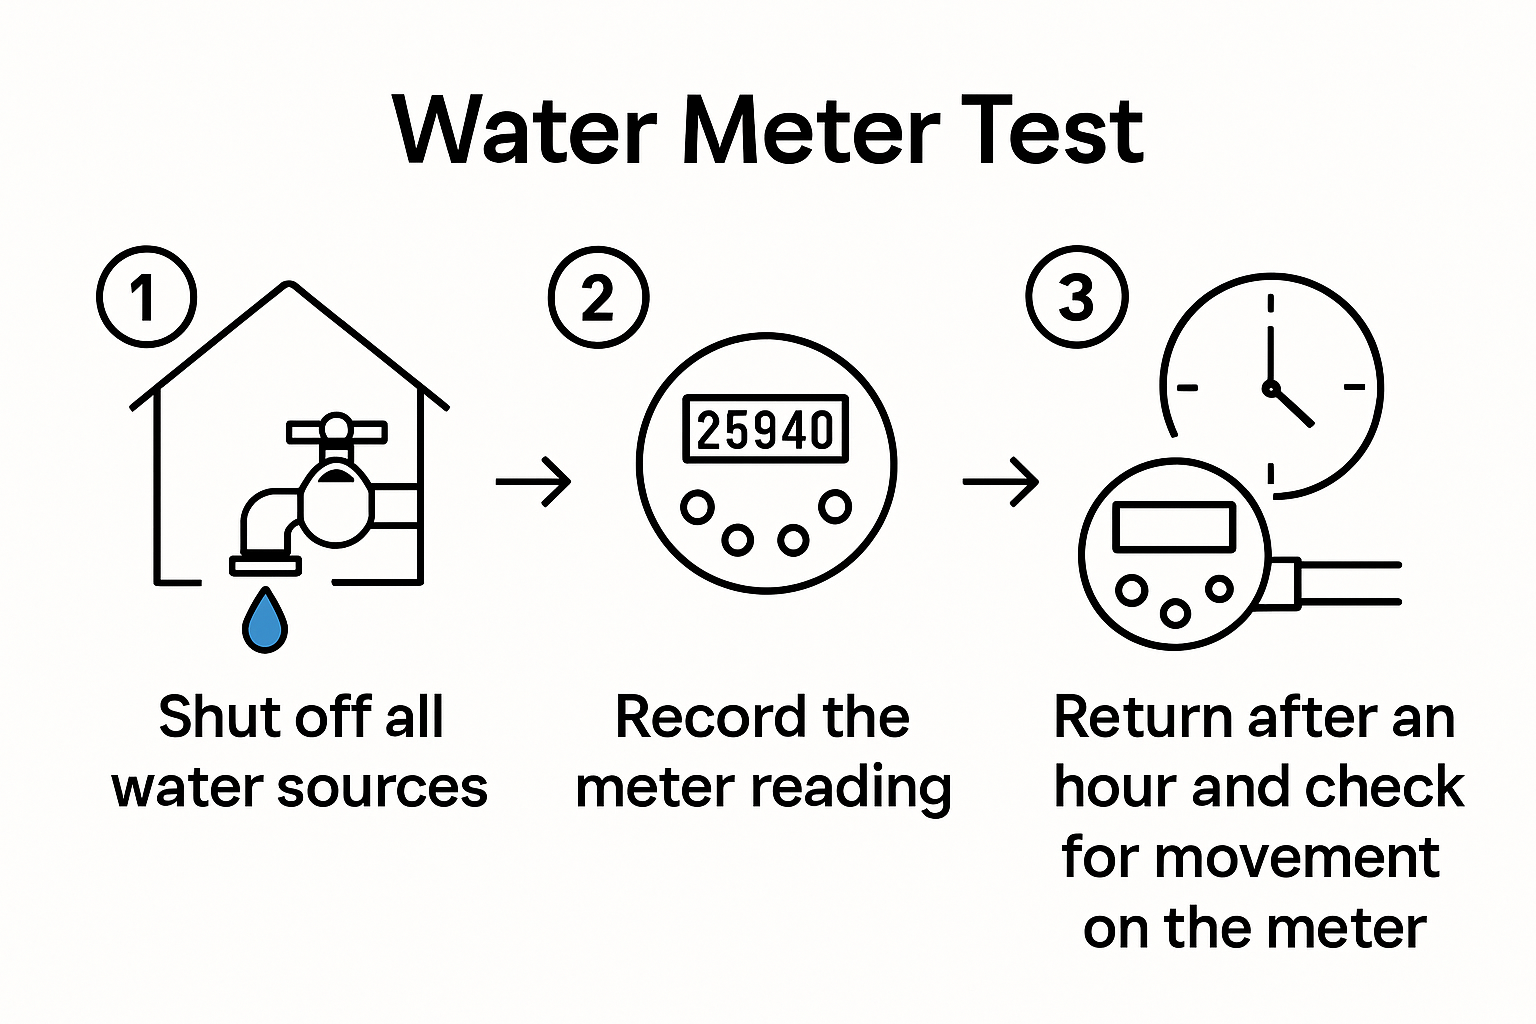
Pay special attention to small spinning dials or digital displays that might indicate minimal but persistent water movement.
Understanding your water meter’s unique characteristics becomes crucial in this detection process. Some meters have a small triangle or dial that spins even with minimal water flow. Watch this indicator carefully during your test. If it moves when all water sources are off, you’ve discovered strong evidence of a hidden leak. Document your findings with photographs and notes, creating a clear record that can help professional plumbers diagnose the exact location and nature of potential water loss.
Step 4: Check for Signs of Water Damage Inside and Outside
Water damage can silently infiltrate your home, creating structural risks and potential health hazards if left undetected. This critical step involves a comprehensive examination of both interior and exterior spaces, looking for subtle and overt signs of moisture intrusion that could indicate hidden leaks. Your goal is to become a detective, uncovering evidence of water problems before they escalate into major repair challenges.
Inside your home, wall and ceiling surfaces reveal critical leak indicators. Examine painted surfaces carefully for discoloration, which often appears as yellowish or brownish stains that spread irregularly. Bubbling or peeling paint suggests moisture trapped behind walls, potentially from pipe leaks or roof water infiltration. Run your hands gently along walls and ceilings, feeling for soft spots or unexpected dampness that visual inspection might miss. Explore professional leak detection methods to understand more advanced diagnostic techniques.
Transition your investigation to flooring and baseboards, which are particularly vulnerable to water damage. Hardwood floors might show warping or unusual discoloration when persistent moisture is present. Examine carpet edges and baseboards for signs of water staining or unexpected softness. In tile areas, look for grout discoloration or areas where tiles seem loose, which could indicate water has compromised the underlying surface.
Moving outside, your home’s exterior provides additional leak detection opportunities. Inspect your foundation carefully for unexplained wet spots, moss growth, or areas where soil seems consistently damp. Pay special attention to regions near outdoor faucets, irrigation systems, and areas where landscaping meets your home’s structure. Unusual vegetation growth or consistently wet ground can signal underground pipe leaks that might go unnoticed for extended periods.
Document your findings meticulously. Take clear, dated photographs of any suspicious areas, measuring and marking locations of potential water damage. These records become invaluable if you need professional assessment or want to track potential leak progression. Remember, thorough observation and patience are your greatest tools in protecting your home from water-related damage.
The following table summarizes the main signs of water damage to look for during your inspections, as described in the article. Use this checklist to ensure you investigate all key symptoms of potential hidden leaks.
| Sign of Water Damage | Where to Look | What It Might Indicate |
|---|---|---|
| Discoloration (yellow/brown) | Walls, ceilings, floors | Leaks from pipes or roof |
| Bubbling or peeling paint | Wall and ceiling surfaces | Trapped moisture behind surfaces |
| Warped or soft flooring | Hardwood floors, carpet edges | Persistent moisture or leaks below |
| Stains or moisture around baseboards | Along baseboards, edges of carpets | Floor or wall leaks |
| Rust, puddles near appliances | Around water heaters, washers, fridges | Appliance or plumbing leaks |
| Pooling water near toilets | Floor around toilet bases | Failed seals or hidden pipe leaks |
| Unexplained damp spots outside | Foundation, outdoor faucet areas, soil | Underground or exterior pipe leaks |
Step 5: Use Specialized Equipment to Identify Hidden Leaks
Specialized leak detection equipment transforms amateur investigations into professional-grade diagnostics, allowing homeowners to uncover water problems lurking beyond visual detection. These sophisticated tools penetrate walls, floors, and hidden spaces, revealing moisture issues that traditional methods might completely miss. By strategically employing these advanced technologies, you can prevent potentially catastrophic water damage before it becomes a costly nightmare.
Moisture meters represent your first line of high-tech leak investigation. These handheld devices measure water content in various materials with remarkable precision. When pressed against walls, floors, or wooden surfaces, they provide digital readings indicating potential moisture accumulation. Some advanced models even color-code results, making it easy to understand the severity of potential water intrusion. Learn more about professional leak detection techniques to enhance your understanding of these remarkable tools.
Infrared thermal imaging cameras offer another powerful diagnostic method for detecting hidden leaks. These devices visualize temperature variations that often indicate moisture presence. By scanning walls and surfaces, thermal cameras reveal cooler areas suggesting water infiltration. The visual representation makes it incredibly simple to pinpoint exact locations of potential leaks. Professionals appreciate these cameras because they provide non-invasive detection, eliminating the need for destructive wall opening or extensive exploratory work.
Accoustic listening devices represent a more subtle yet incredibly effective leak detection method. These specialized microphones amplify sound frequencies produced by water movement within pipes and walls. By carefully moving the device across surfaces, you can hear distinct sounds indicating water leakage. Some advanced models even provide digital analysis, helping distinguish between normal plumbing sounds and potential leak indicators. Pay close attention to unexpected hissing, dripping, or rushing sounds that might signal hidden water movement.
When using these specialized tools, documentation becomes crucial. Record your measurements, take photographs of thermal images, and note precise locations of potential issues. This systematic approach transforms your leak detection from a guessing game into a scientific investigation, providing clear evidence that can help professional plumbers quickly diagnose and resolve any water-related problems in your home.
Step 6: Verify Leak Detection Results and Plan Repairs
Verifying leak detection results transforms your investigative efforts from preliminary diagnosis to actionable repair strategy. This critical stage involves carefully analyzing all gathered evidence, cross-referencing your findings, and developing a systematic approach to addressing potential water damage. Your goal is to create a comprehensive plan that prevents further structural deterioration and minimizes potential repair costs.
Compile and compare all diagnostic information from previous investigation stages. Review moisture meter readings, thermal imaging results, acoustic detection notes, and visual inspection photographs. Look for consistent indicators across multiple detection methods that confirm the presence and potential location of leaks. Patterns and overlapping evidence provide the most reliable insights into water intrusion points. Explore our comprehensive leak repair strategies to understand professional assessment techniques.
Classify your findings based on severity and potential impact. Minor leaks might require simple repairs like replacing a washer or resealing a pipe joint. More significant issues could demand extensive pipe replacement or structural repairs. Pay close attention to areas showing repeated moisture accumulation or signs of long-term water damage. These locations often indicate systemic problems that extend beyond surface-level repairs.
Develop a prioritized repair strategy that addresses immediate risks while planning for potential future interventions. Consider creating a detailed document that includes precise leak locations, detection method results, potential repair approaches, and estimated costs. This documentation serves multiple purposes: it helps you track the progression of water damage, provides a clear roadmap for repairs, and can be valuable if you need to consult professional plumbers or file insurance claims.
Finalize your verification process by conducting a final moisture test in identified problem areas. This confirmatory step ensures that your detection methods accurately pinpointed the leak sources. Take additional photographs documenting your findings, and if possible, mark the exact locations of potential repairs.
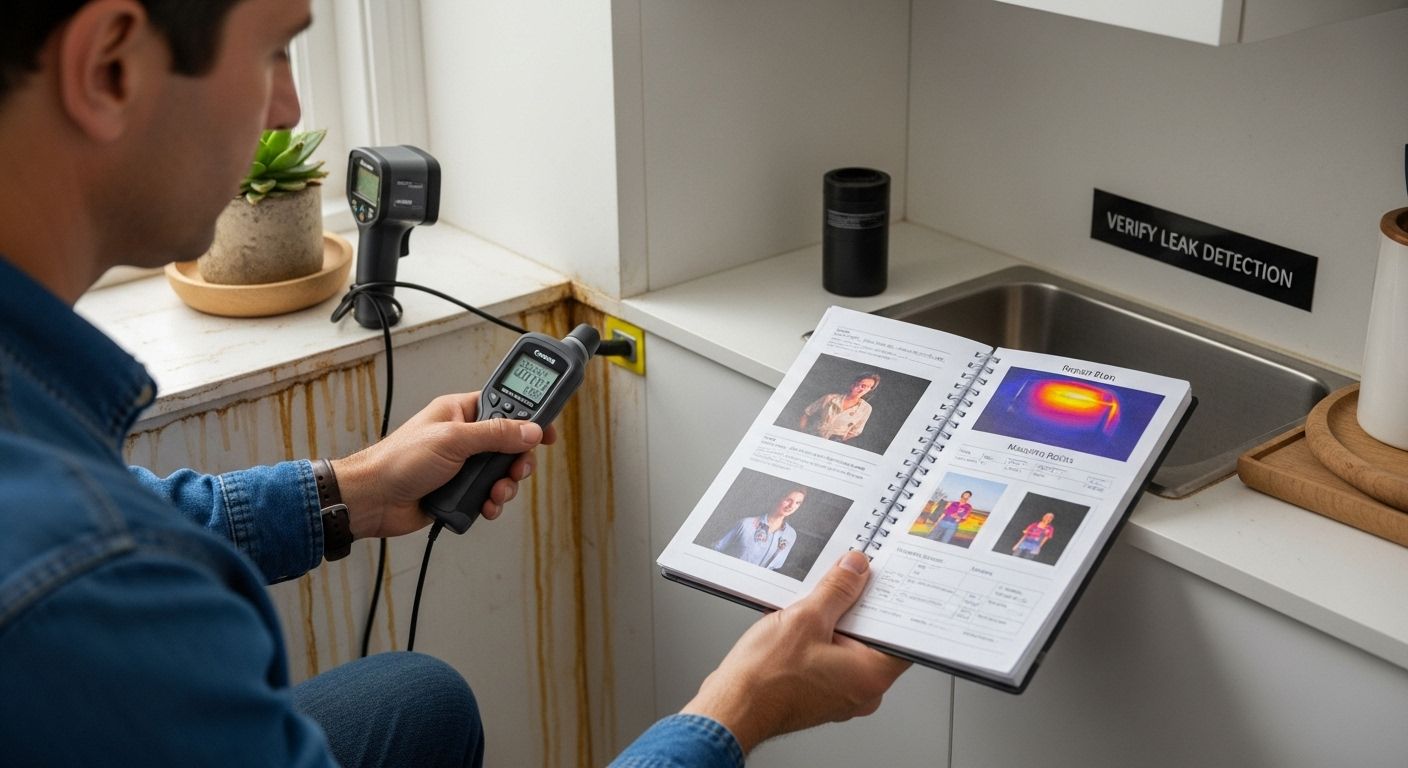
Remember that thorough documentation and a methodical approach are your best defense against escalating water damage and unexpected home repair expenses.
Ready to Solve Hidden Leaks Before They Cause Major Damage?
Hidden leaks can sneak up on any homeowner, leaving you frustrated by stubborn water stains, unexplained dampness, and rising utility bills. Even after you follow every detection step from checking the water meter to inspecting for moisture with thermal devices, finding and fixing the source can still feel overwhelming. You deserve a reliable partner who understands both the urgency and the stress that water damage brings.

Stop guessing and protect your home now. Let the experts at Legacy Plumbing & Drain Inc take over, using industry-leading leak detection and repair tools that guarantee peace of mind. Whether you need advanced diagnostics, emergency service, or just want to ensure your home stays safe and dry, we are available 24/7 in Sacramento. Contact us today and turn your leak concerns into lasting solutions.
Frequently Asked Questions
How can I tell if I have a hidden leak in my home?
Check for signs of water damage such as discoloration on walls and ceilings, warped flooring, and unexplained moisture around fixtures. Monitoring your water meter for unusual usage when all taps are off can also indicate a hidden leak.
What tools do I need for detecting hidden leaks?
Essential tools include a high-powered flashlight, clean towels or paper towels, a moisture meter, a notepad and pen for documentation, and specialized equipment like infrared thermal imaging cameras or acoustic listening devices for more advanced detection.
How does a moisture meter work in leak detection?
A moisture meter measures the water content in materials like walls and floors. When pressed against a surface, it provides a digital reading that helps identify areas with excessive moisture, indicating a potential leak.
What should I do if I find signs of a leak?
Document your findings with photographs and notes, then develop a repair plan based on the severity of the leak. If necessary, consult a professional plumber for a thorough assessment and repairs.
Recommended
- Importance Of Leak Detection For Sacramento Area Homeowners 2025 – Legacy Plumbing & Drain – Emergency Plumbers Of Sacramento
- How To Detect Slab Leaks: Guide For Sacramento Homeowners 2025 – Legacy Plumbing & Drain – Emergency Plumbers Of Sacramento
- How Plumbers Detect Leaks: Guide For Sacramento Homeowners 2025 – Legacy Plumbing & Drain – Emergency Plumbers Of Sacramento
- How Plumbers Detect Leaks: Guide For Sacramento Homeowners 2025 – Legacy Plumbing & Drain – Emergency Plumbers Of Sacramento
- Understanding Why Repair Roof Leaks Matters For Homeowners | Midlands Roofing & Exteriors, LLC
- Sliding Door Security A Homeowner’s Guide – My Locksmiths CA